

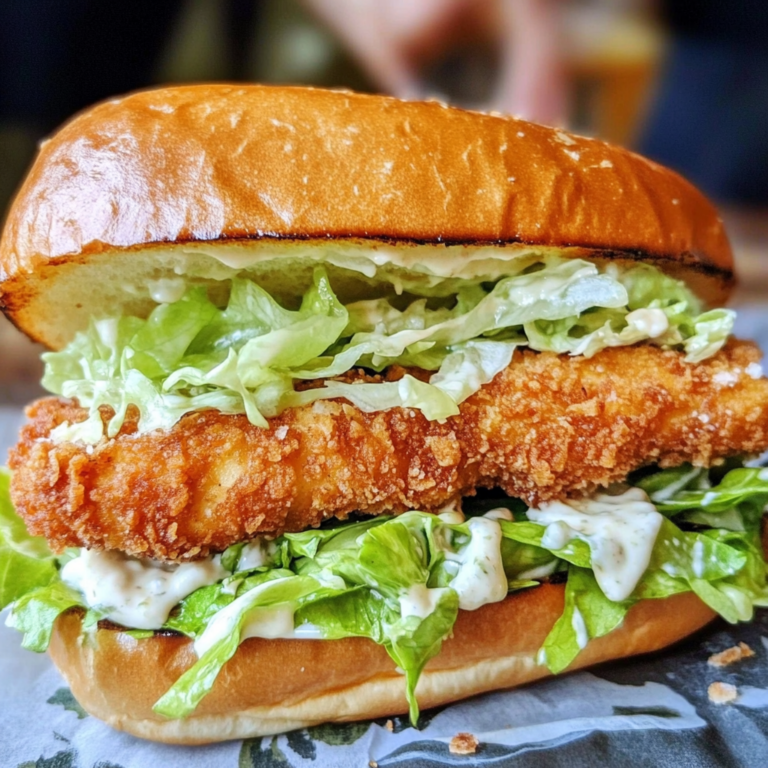
Crispy Chicken Caesar Sandwich: The Ultimate Recipe & Guide is a delightful meal that will elevate your lunch or dinner. This sandwich features crispy, juicy chicken breast coated in a crunchy breading and topped with homemade Caesar dressing, fresh romaine lettuce, and Parmesan cheese, all served on a toasted brioche bun. Perfect for any occasion, this recipe combines bold flavors and satisfying textures that everyone will love.
Why You’ll Love This Recipe
- Irresistible Flavor: The combination of fried chicken and creamy Caesar dressing creates a mouthwatering taste that is hard to resist.
- Easy to Make: With simple ingredients and straightforward steps, this recipe is accessible for cooks of all skill levels.
- Customizable: Feel free to add your favorite toppings like tomato slices or avocado for extra flavor and nutrition.
- Perfect for Any Meal: Whether it’s lunch or dinner, this sandwich fits seamlessly into any mealtime routine.
- A Family Favorite: It’s a guaranteed hit with both kids and adults, making it great for family gatherings or casual dinners.
Tools and Preparation
Before you start cooking the Crispy Chicken Caesar Sandwich, gather the necessary tools. Having everything ready will make the process smoother and more enjoyable.
Essential Tools and Equipment
- Heavy-bottomed skillet or Dutch oven
- Medium mixing bowls
- Wire rack
- Shallow dish for dredging
- Slotted spoon
Importance of Each Tool
- Heavy-bottomed skillet or Dutch oven: These provide even heat distribution for frying, ensuring the chicken cooks perfectly without burning.
- Wire rack: Allows excess oil to drain off the chicken after frying, keeping it crispy.
- Shallow dish for dredging: Makes coating the chicken easy and helps achieve an even breading.


Ingredients
Crispy, juicy chicken breast in flavorful, crunchy breading, topped with homemade Caesar dressing, romaine lettuce, and Parmesan cheese, all on a toasted brioche bun.
For the Chicken:
- 4 boneless, skinless chicken breasts (about 6 oz each)
- 1 cup buttermilk
- 1 tablespoon hot sauce (such as Frank’s RedHot)
- 1 teaspoon salt
- 1/2 teaspoon black pepper
- 1 cup all-purpose flour
- 1/2 cup cornstarch
- 1 tablespoon garlic powder
- 1 tablespoon onion powder
- 1 teaspoon paprika
- 1/2 teaspoon cayenne pepper (optional, for extra heat)
- Vegetable oil, for frying
For the Dressing:
- 1/2 cup mayonnaise
- 2 tablespoons grated Parmesan cheese
- 1 tablespoon lemon juice
- 1 teaspoon Dijon mustard
- 1 clove garlic, minced
- 1/2 teaspoon Worcestershire sauce
- 1/4 teaspoon black pepper
- 2 tablespoons olive oil
For Assembling:
- 4 brioche buns, split
- 4 cups chopped romaine lettuce
- 1/2 cup shaved Parmesan cheese
- Optional: Tomato slices
How to Make Crispy Chicken Caesar Sandwich: The Ultimate Recipe & Guide
Step 1: Marinate the Chicken
In a medium bowl, whisk together the buttermilk, hot sauce, salt, and pepper. Add the chicken breasts to the bowl, ensuring they are fully submerged. Cover with plastic wrap and refrigerate for at least 30 minutes or up to 4 hours.
Step 2: Prepare the Dredging Station
While the chicken marinates, whisk together in a shallow dish all-purpose flour, cornstarch, garlic powder, onion powder, paprika, and cayenne pepper (if using).
Step 3: Dredge the Chicken
Remove chicken from the marinade letting excess drip off. Dredge each chicken breast in the flour mixture one at a time. Press the mixture onto the chicken to ensure it adheres well. Place dredged chicken on a wire rack.
Step 4: Heat the Oil
Pour about 1 inch of vegetable oil into your skillet or Dutch oven. Heat over medium-high until it reaches 350°F (175°C).
Step 5: Fry the Chicken
Carefully place dredged chicken breasts into hot oil without overcrowding. Fry each side for about 6-8 minutes until golden brown and cooked through. Internal temperature should be 165°F (74°C).
Step 6: Drain the Chicken
Once cooked, remove chicken from oil using a slotted spoon. Place on a wire rack lined with paper towels to drain excess oil.
Step 7: Combine Dressing Ingredients
In another bowl, whisk together mayonnaise, Parmesan cheese, lemon juice, Dijon mustard, minced garlic, Worcestershire sauce, and black pepper.
Step 8: Emulsify the Dressing
While whisking constantly, slowly drizzle in olive oil until smooth and emulsified.
Step 9: Taste and Adjust Dressing
Taste your dressing to adjust seasonings if needed.
Step 10: Toast the Buns (Optional)
If desired, lightly toast your brioche buns before assembling.
Step 11: Spread the Dressing
Spread a generous amount of Caesar dressing on both halves of each brioche bun.
Step 12: Add Lettuce
Place chopped romaine lettuce on bottom half of each bun.
Step 13: Add the Chicken
Top lettuce with crispy fried chicken breast.
Step 14: Add Parmesan Cheese
Sprinkle shaved Parmesan cheese over each piece of chicken.
Step 15: Add Tomato (Optional)
If using tomato slices add them now atop Parmesan cheese.
Step 16: Top with Bun
Place top half of brioche bun over assembled sandwich.
Step 17: Serve Immediately
Serve your Crispy Chicken Caesar Sandwich immediately while still hot and crispy. Enjoy!
How to Serve Crispy Chicken Caesar Sandwich: The Ultimate Recipe & Guide
Serving your Crispy Chicken Caesar Sandwich creatively can elevate the dining experience. Here are some delightful serving suggestions that will impress your guests and make every bite memorable.
Classic Serving Style
- Serve the sandwich with a side of crispy French fries for a traditional touch. The crunchy texture complements the sandwich perfectly.
With a Fresh Side Salad
- Pair your sandwich with a light garden salad dressed in vinaigrette. This adds freshness and balances the richness of the chicken.
Add Tomato Slices
- Enhance your sandwich by adding fresh tomato slices for extra juiciness and flavor. It’s a simple addition that makes a big difference.
Chips for Crunch
- Serve with kettle-cooked potato chips for an added crunch factor. Choose flavors like sea salt or vinegar to add depth.
Pickles on the Side
- A small bowl of pickles offers a tangy contrast that cuts through the richness of the dressing and chicken.
How to Perfect Crispy Chicken Caesar Sandwich: The Ultimate Recipe & Guide
Perfecting your Crispy Chicken Caesar Sandwich involves attention to detail. Here are some essential tips to ensure each sandwich is delicious and satisfying.
- Choose Quality Chicken: Use fresh, high-quality chicken breasts for better flavor and texture.
- Marinate Longer: For maximum flavor, marinate the chicken for up to 4 hours instead of just 30 minutes.
- Heat Oil Properly: Make sure the oil is at the right temperature (350°F) before frying for a perfect crispy crust.
- Don’t Overcrowd the Pan: Fry in batches to prevent steaming, which can lead to soggy breading.
- Serve Immediately: Enjoy your sandwiches right after assembling them while the chicken is still hot and crispy.
Best Side Dishes for Crispy Chicken Caesar Sandwich: The Ultimate Recipe & Guide
Complementing your Crispy Chicken Caesar Sandwich with sides can enhance your meal. Here are some delicious side dish options:
- Garlic Bread: Toasted garlic bread adds a flavorful crunch that pairs beautifully with the rich flavors of the sandwich.
- Sweet Potato Fries: These provide a sweet contrast to the savory chicken, offering both taste and color on your plate.
- Coleslaw: A creamy or vinegar-based coleslaw offers crunch and tanginess, balancing out the richness of the sandwich.
- Roasted Vegetables: Seasonal roasted veggies like zucchini, bell peppers, or carrots add nutrition and vibrant colors.
- Stuffed Mushrooms: Savory stuffed mushrooms make an elegant appetizer that complements the main course well.
- Fruit Salad: A refreshing fruit salad with seasonal fruits adds sweetness and lightness to offset heavier flavors.
Common Mistakes to Avoid
Making a Crispy Chicken Caesar Sandwich can be straightforward, but avoiding common mistakes is key to perfecting this delicious dish.
- Not Marinating Long Enough: Failing to marinate the chicken for at least 30 minutes can result in less flavorful meat. Allowing it to soak longer enhances the taste.
- Skipping the Dredging Process: Neglecting to dredge the chicken properly can lead to uneven coating. Ensure each piece is well-coated for that perfect crispy texture.
- Overcrowding the Pan: Placing too many chicken breasts in the frying oil at once can lower the temperature, causing soggy rather than crispy chicken. Fry in batches for optimal results.
- Inadequate Oil Temperature: Cooking in oil that’s not hot enough will make the chicken greasy instead of crispy. Use a thermometer to ensure it reaches 350°F (175°C) before frying.
- Ignoring Dressing Emulsification: Adding olive oil too quickly can prevent your dressing from emulsifying. Whisk slowly while drizzling for a smooth consistency.
Storage & Reheating Instructions
Refrigerator Storage
- Store leftover sandwiches in an airtight container.
- They will keep well in the refrigerator for up to 3 days.
Freezing Crispy Chicken Caesar Sandwich: The Ultimate Recipe & Guide
- Wrap each sandwich tightly in plastic wrap and then foil.
- Frozen sandwiches are best enjoyed within 1-2 months for optimal taste.
Reheating Crispy Chicken Caesar Sandwich: The Ultimate Recipe & Guide
- Oven: Preheat to 375°F (190°C). Place the sandwich on a baking sheet and heat for about 10-15 minutes until warm and crispy.
- Microwave: Heat on medium power for about 1-2 minutes, but note that it may not retain its crispiness.
- Stovetop: Reheat in a skillet over medium heat, covered, for about 5-7 minutes. This helps maintain crispiness while warming through.
Frequently Asked Questions
What makes this Crispy Chicken Caesar Sandwich special?
The combination of juicy fried chicken and homemade Caesar dressing creates an irresistible flavor profile that elevates this classic sandwich.
Can I use other meats besides chicken?
Yes, you can substitute chicken with turkey or even beef if you prefer a different flavor. Just adjust cooking times accordingly.
How do I make this sandwich healthier?
You can use grilled chicken instead of fried or opt for whole-grain buns and add more fresh vegetables like sliced cucumbers or bell peppers.
Can I prepare the dressing ahead of time?
Absolutely! The dressing can be made up to two days in advance and stored in the refrigerator until you’re ready to assemble your sandwich.
What should I serve with my Crispy Chicken Caesar Sandwich?
This sandwich pairs well with a light salad, sweet potato fries, or a refreshing coleslaw for a balanced meal.
Final Thoughts
The Crispy Chicken Caesar Sandwich is not only delicious but also versatile, making it perfect for lunch or dinner. With simple ingredients and easy customization options, it’s an excellent choice for any occasion. Give it a try and impress your family or guests!
Crispy Chicken Caesar Sandwich
Crispy Chicken Caesar Sandwich: The Ultimate Recipe & Guide is a delightful twist on a classic favorite that promises to satisfy your cravings. This sandwich features tender, juicy chicken breast coated in a crunchy breading, topped with homemade Caesar dressing, fresh romaine lettuce, and Parmesan cheese, all nestled within a toasted brioche bun. Ideal for lunch or dinner, this recipe combines irresistible flavors and textures that will please everyone at the table. Whether you’re hosting family or just enjoying a meal at home, this crispy chicken delight is sure to be a hit.
- Total Time: 50 minutes
- Yield: Serves 4
Ingredients
- 4 boneless, skinless chicken breasts
- 1 cup buttermilk
- 1 tablespoon hot sauce (such as Frank’s RedHot)
- 1 teaspoon salt
- 1/2 teaspoon black pepper
- 1 cup all-purpose flour
- 1/2 cup cornstarch
- 1 tablespoon garlic powder
- 1 tablespoon onion powder
- 1 teaspoon paprika
- 1/2 teaspoon cayenne pepper (optional)
- Vegetable oil, for frying
- 1/2 cup mayonnaise
- 2 tablespoons grated Parmesan cheese
- 1 tablespoon lemon juice
- 1 teaspoon Dijon mustard
- 1 clove garlic, minced
- 1/4 teaspoon black pepper
- 2 tablespoons olive oil
- 4 brioche buns, split
- 4 cups chopped romaine lettuce
- 1/2 cup shaved Parmesan cheese
- Optional: Tomato slices
Instructions
- In a medium bowl, whisk together the buttermilk, hot sauce, salt, and pepper. Add the chicken breasts to the bowl, ensuring they are fully submerged. Cover with plastic wrap and refrigerate for at least 30 minutes or up to 4 hours.
- While the chicken marinates, whisk together in a shallow dish all-purpose flour, cornstarch, garlic powder, onion powder, paprika, and cayenne pepper (if using).
- Remove chicken from the marinade letting excess drip off. Dredge each chicken breast in the flour mixture one at a time. Press the mixture onto the chicken to ensure it adheres well. Place dredged chicken on a wire rack.
- Pour about 1 inch of vegetable oil into your skillet or Dutch oven. Heat over medium-high until it reaches 350°F (175°C).
- Carefully place dredged chicken breasts into hot oil without overcrowding. Fry each side for about 6-8 minutes until golden brown and cooked through. Internal temperature should be 165°F (74°C).
- Once cooked, remove chicken from oil using a slotted spoon. Place on a wire rack lined with paper towels to drain excess oil.
- In another bowl, whisk together mayonnaise, Parmesan cheese, lemon juice, Dijon mustard, minced garlic, Worcestershire sauce, and black pepper.
- While whisking constantly, slowly drizzle in olive oil until smooth and emulsified.
- Taste your dressing to adjust seasonings if needed.
- If desired, lightly toast your brioche buns before assembling.
- Spread a generous amount of Caesar dressing on both halves of each brioche bun.
- Place chopped romaine lettuce on bottom half of each bun.
- Top lettuce with crispy fried chicken breast.
- Sprinkle shaved Parmesan cheese over each piece of chicken.
- If using tomato slices add them now atop Parmesan cheese.
- Place top half of brioche bun over assembled sandwich.
- Serve your Crispy Chicken Caesar Sandwich immediately while still hot and crispy.
- Prep Time: 30 minutes
- Cook Time: 20 minutes
- Category: Main
- Method: Frying
- Cuisine: American
Nutrition
- Serving Size: 1 sandwich
- Calories: 650
- Sugar: 3g
- Sodium: 950mg
- Fat: 34g
- Saturated Fat: 8g
- Unsaturated Fat: 24g
- Trans Fat: 0g
- Carbohydrates: 53g
- Fiber: 2g
- Protein: 36g
- Cholesterol: 120mg


Leave a Comment