
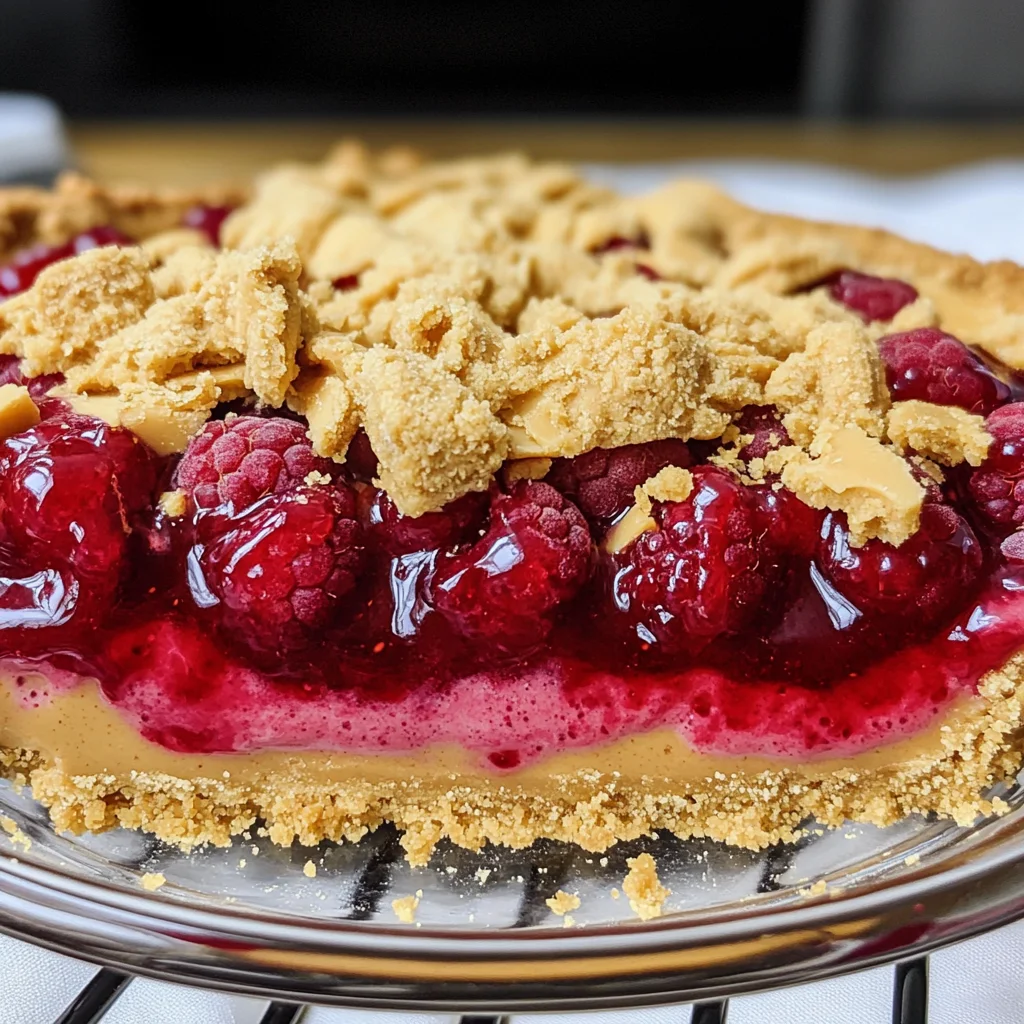
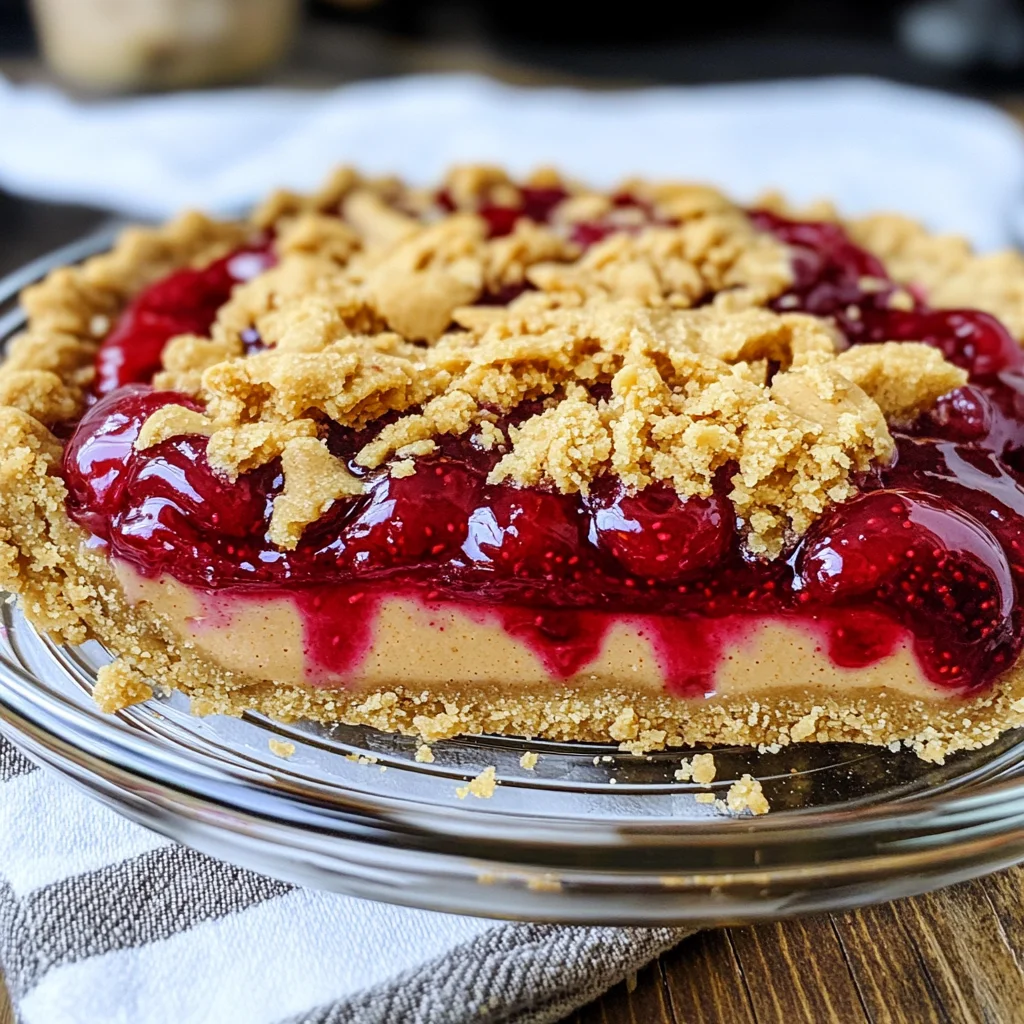
Peanut Butter and Jelly Pie is a delightful dessert that combines the classic flavors of peanut butter and jelly in a creamy, indulgent pie. It’s perfect for various occasions, whether you’re hosting a picnic, celebrating a birthday, or simply satisfying your sweet tooth. This recipe stands out due to its rich, velvety filling and the delightful crunch from the peanut butter cookie crust.
Why You’ll Love This Recipe
- Easy to Make: This pie requires simple ingredients and straightforward steps, making it accessible for bakers of all levels.
- Delicious Flavor Combination: The pairing of peanut butter and raspberry creates a sweet and tangy flavor that everyone will love.
- Versatile Dessert: Perfect for any gathering, this pie can be served at birthdays, picnics, or family dinners.
- Make Ahead Option: You can prepare this pie in advance, saving you time on the day of your event.
- Kid-Friendly Fun: Kids will enjoy helping to make this pie, allowing for family bonding in the kitchen.
Tools and Preparation
Gathering the right tools will help streamline your baking process. Here’s what you’ll need to create this delicious Peanut Butter and Jelly Pie.
Essential Tools and Equipment
- A mixing bowl
- A pie dish
- A saucepan
- Measuring cups
- Measuring spoons
- A whisk or spoon
Importance of Each Tool
- Mixing Bowl: Essential for combining ingredients evenly, ensuring a smooth texture in your filling.
- Pie Dish: Provides the perfect shape for your Peanut Butter and Jelly Pie while allowing easy slicing for serving.
- Saucepan: Needed for heating fruit mixtures or sauces, which enhances the flavors before incorporating them into your pie.

Ingredients
For the Raspberry Filling
- 3 cups frozen raspberries (thawed)
- ½ cup sugar
- 1 tbsp cornstarch
- ½ tsp kosher salt (or ¼ tsp table salt)
- ¾ tsp unflavoured vegan gelatin
- 1 ½ tsp water
For the Peanut Butter Cookie Crust
- ⅓ cup sugar
- 3 tbsp brown sugar (packed)
- ⅔ cup all-purpose flour
- ¼ cup PB2 powder
- ½ tsp baking powder
- ½ tsp kosher salt (or ¼ tsp table salt)
- 6 tbsp unsalted butter (melted)
- 225 g peanut butter cookies (about 6 large cookies)
For the Creamy Filling
- ¼ cup salted peanuts (chopped)
- 2 tbsp sugar
- ½ tsp kosher salt (or ¼ tsp table salt)
- 4 tbsp unsalted butter (melted)
- 1 ½ cups whipping cream
- 8 oz cream cheese (softened)
- 1 cup creamy peanut butter
- 1 cup powdered icing sugar
- 1 tsp vanilla extract
How to Make Peanut Butter and Jelly Pie
Step 1: Prepare the Raspberry Filling
- In a saucepan over medium heat, combine the thawed raspberries with sugar, cornstarch, kosher salt, vegan gelatin, and water.
- Cook while stirring until the mixture thickens; this should take about 5-7 minutes. Remove from heat and let cool slightly.
Step 2: Make the Peanut Butter Cookie Crust
- Preheat your oven to 350°F (175°C).
- In a mixing bowl, combine sugars, flour, PB2 powder, baking powder, and kosher salt.
- Stir in melted butter until fully incorporated.
- Press the mixture firmly into a pie dish to form an even crust.
- Bake in preheated oven for about 10-12 minutes until lightly golden. Allow to cool completely.
Step 3: Prepare the Creamy Filling
- In another bowl, beat together softened cream cheese and creamy peanut butter until smooth.
- Gradually add powdered icing sugar and continue mixing until combined.
- In a separate bowl, whip the heavy cream until soft peaks form before gently folding it into the peanut butter mixture.
Step 4: Assemble Your Peanut Butter and Jelly Pie
- Once cooled, spread half of the raspberry filling evenly over the baked crust.
- Pour the creamy filling over the raspberry layer and smooth out with a spatula.
- Top with remaining raspberry filling and sprinkle chopped salted peanuts on top as garnish.
Step 5: Chill Before Serving
Refrigerate your assembled Peanut Butter and Jelly Pie for at least four hours or overnight for best results before slicing and serving!
How to Serve Peanut Butter and Jelly Pie
Peanut Butter and Jelly Pie is a delightful dessert that pairs wonderfully with various accompaniments. Whether you’re hosting a gathering or enjoying a cozy night in, these serving suggestions will enhance your pie experience.
With Whipped Cream
- Add a dollop of freshly whipped cream on top for a light and airy contrast to the rich pie.
Fresh Berries
- Serve alongside fresh raspberries or strawberries for a fruity burst that complements the flavors.
Ice Cream
- Pair with vanilla or chocolate ice cream for an indulgent treat that balances the creamy texture of the pie.
Drizzled Chocolate Sauce
- A drizzle of chocolate sauce adds an extra layer of sweetness and visual appeal to each slice.
Chopped Nuts
- Sprinkle chopped salted peanuts on top for added crunch and flavor enhancement.
How to Perfect Peanut Butter and Jelly Pie
Creating the perfect Peanut Butter and Jelly Pie requires attention to detail. Here are some tips to ensure your pie turns out great every time.
-
Use Room Temperature Ingredients: Bring cream cheese and peanut butter to room temperature for easier mixing and smoother texture.
-
Don’t Overmix: Mix ingredients just until combined to avoid a dense filling; overmixing can make it heavy.
-
Chill Thoroughly: Allow the pie to chill in the refrigerator for at least 4 hours or overnight for the best set.
-
Taste as You Go: Adjust sweetness by adding more sugar if needed, especially if your berries are tart.
-
Garnish Creatively: Use fresh fruit or chocolate shavings as a garnish for an appealing presentation.
Best Side Dishes for Peanut Butter and Jelly Pie
Pairing side dishes with your Peanut Butter and Jelly Pie can elevate your dessert experience. Here are some delightful options that complement its flavors perfectly.
-
Fruit Salad: A refreshing mix of seasonal fruits offers brightness and contrasts well with the rich pie.
-
Chocolate Chip Cookies: Classic cookies bring nostalgia and sweetness, enhancing the dessert theme.
-
Cheese Platter: A selection of mild cheeses provides savory notes that balance the sweet flavors of the pie.
-
Green Salad: A light salad with vinaigrette cuts through the richness, adding freshness to your meal.
-
Yogurt Parfait: Layers of yogurt with granola add creamy texture and crunch, making a satisfying side.
-
Smoothies: A berry or banana smoothie makes for a sweet yet healthy drink option alongside dessert.
Common Mistakes to Avoid
- Avoid overheating the filling. Make sure to monitor the heat when cooking the raspberry mixture to prevent burning. Use low to medium heat for best results.
- Don’t skip the chilling time. Allow the pie to set in the refrigerator for at least 4 hours before serving. This helps the filling firm up and enhances flavors.
- Be careful not to overmix the crust. When combining the crust ingredients, mix just until incorporated to prevent a tough texture.
- Avoid using incorrect measurements. Always use measuring cups and spoons for accuracy, especially with ingredients like sugar and flour; this can greatly affect the outcome.
- Don’t forget about allowing cream cheese to soften. For a smooth filling, ensure your cream cheese is at room temperature before mixing.
Storage & Reheating Instructions
Refrigerator Storage
- Store in an airtight container for up to 3 days.
- Cover the pie with plastic wrap or aluminum foil to maintain freshness.
Freezing Peanut Butter and Jelly Pie
- Freeze in a well-wrapped container for up to 2 months.
- Consider slicing before freezing for easy serving later.
Reheating Peanut Butter and Jelly Pie
- Oven: Preheat oven to 350°F (175°C), cover with foil, and heat for about 15-20 minutes until warm.
- Microwave: Place a slice on a microwave-safe plate, cover lightly, and heat for 30 seconds or until warm.
- Stovetop: Heat in a skillet over low heat, covering with a lid until warmed through.
Frequently Asked Questions
Here are some common questions about Peanut Butter and Jelly Pie that may help you in your baking journey.
Can I use other fruits instead of raspberries?
Yes, you can substitute other fruits like strawberries or blueberries for a different flavor profile while keeping the same technique.
How do I make this pie nut-free?
To make a nut-free version of Peanut Butter and Jelly Pie, consider using sunflower seed butter as an alternative to peanut butter.
What can I serve with Peanut Butter and Jelly Pie?
This pie pairs wonderfully with whipped cream, fresh fruit, or even a drizzle of chocolate sauce for added indulgence.
Can I make Peanut Butter and Jelly Pie ahead of time?
Absolutely! This pie can be made a day or two in advance, allowing flavors to meld beautifully while saving time on serving day.
Final Thoughts
Peanut Butter and Jelly Pie is not only delicious but also versatile. You can customize it with different fruit flavors or toppings according to your taste preferences. This delightful dessert will surely impress friends and family alike—give it a try!

Peanut Butter and Jelly Pie
Indulge in the creamy decadence of Peanut Butter and Jelly Pie, a delightful dessert that captures the classic flavors of peanut butter and raspberry jelly. With its velvety filling nestled in a crunchy peanut butter cookie crust, this pie is perfect for any occasion—be it a picnic, birthday celebration, or a cozy night in. Easy to make and kid-friendly, this recipe allows you to create a sweet treat that will impress family and friends alike. Prepare it ahead of time for stress-free entertaining, and watch as everyone delights in each delicious slice!
- Total Time: 45 minutes
- Yield: Serves approximately 8 slices 1x
Ingredients
- 3 cups frozen raspberries
- ½ cup sugar
- 1 tbsp cornstarch
- ½ tsp kosher salt (or ¼ tsp table salt)
- ¾ tsp unflavoured vegan gelatin
- 1 ½ tsp water
- ⅓ cup sugar
- 3 tbsp brown sugar (packed)
- ⅔ cup all-purpose flour
- ¼ cup PB2 powder
- ½ tsp baking powder
- ½ tsp kosher salt (or ¼ tsp table salt)
- 6 tbsp unsalted butter (melted)
- 225 g peanut butter cookies (about 6 large cookies)
- ¼ cup salted peanuts (chopped)
- 2 tbsp sugar
- ½ tsp kosher salt (or ¼ tsp table salt)
- 4 tbsp unsalted butter (melted)
- 1 ½ cups heavy cream
- 8 oz cream cheese (softened)
- 1 cup creamy peanut butter
- 1 cup powdered icing sugar
- 1 tsp vanilla extract
Instructions
- For the raspberry filling: In a saucepan, combine thawed raspberries, sugar, cornstarch, vegan gelatin, and water. Cook over medium heat until thickened (about 5-7 minutes). Let cool.
- For the cookie crust: Preheat oven to 350°F (175°C). Mix sugars, flour, PB2 powder, baking powder, and salt. Stir in melted butter; press mixture into a pie dish. Bake for 10-12 minutes until golden. Cool completely.
- For the creamy filling: Beat cream cheese and peanut butter until smooth. Gradually add powdered icing sugar. In another bowl, whip heavy cream to soft peaks; fold into the peanut butter mixture.
- Assemble: Spread half of the raspberry filling over cooled crust, pour creamy filling on top, then add remaining raspberry filling and garnish with chopped peanuts.
- Chill for at least four hours before serving.
- Prep Time: 30 minutes
- Cook Time: 15 minutes
- Category: Dessert
- Method: Baking
- Cuisine: American
Nutrition
- Serving Size: 1 slice (120g)
- Calories: 320
- Sugar: 24g
- Sodium: 230mg
- Fat: 22g
- Saturated Fat: 8g
- Unsaturated Fat: 14g
- Trans Fat: 0g
- Carbohydrates: 28g
- Fiber: 3g
- Protein: 5g
- Cholesterol: 30mg

Leave a Comment